How to Draw a Pond Easily
How to draw a pond. Life can get hectic and stressful, so slowing down and relaxing by a sparkling pond can be therapeutic. A calm feeling around a pond can have a nice calming effect on you, and you often have fish to admire too! You can’t always visit a pond when you require it most, so learning how to draw it might be the next most helpful thing. This tutorial in front of you will show you how to create your calm pond without frustration! Please sit back, relax and enjoy our 6-step guide to drawing ponds prepared for you.
Also read: simple house drawing
How to Draw a Pond
Step 1
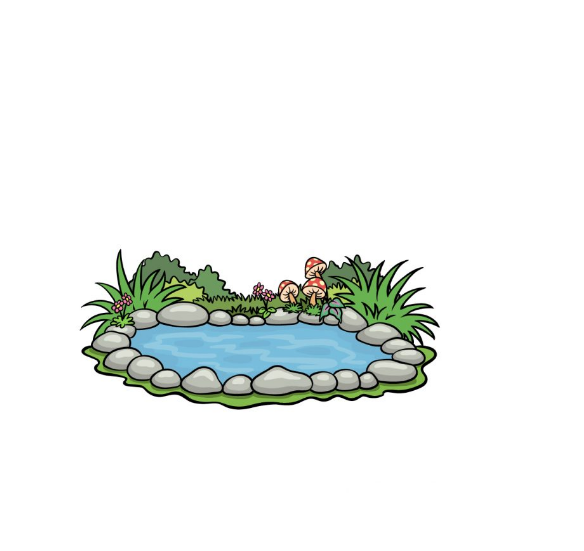
The pond we will draw today will have a nice row of stones to add a relaxing feeling to the scene. With these stones, we will start drawing a pond in the first step of our guide. We’ll keep it simple when we start this watch, and all you have to do is draw five round, relatively flat shapes of different sizes. Once you’ve drawn those jewels, you can move on to dance two!
Step 2
Now that you’ve started designing your pond layout, we can move on to adding this step. First, we’ll add better stones to the border of the pond. For this image, you can count four to the left of the row you started before and four more to the right. The bricks should be placed to curve slightly upwards, and group the bricks you draw on the right. Finally, to finish this step, you can draw a wavy stripe under the rows of rocks to create a grassy base for them.
Step 3
We’ll continue adding to the outline in this third step of our how to draw a pond guide. We will follow a plan similar to the previous steps to draw more stones. These rocks will help create the complete outline of the pond, as shown in the contact image. However, these rocks have a bit more detail, and you can do this by drawing tufts of grass and flowers on top of them. These details are short but add a lot to the overall image! In the next step, we’ll add even more details to these teams, so if you’re ready, let’s continue!
Stage 4
As we promised in the previous part of drawing the pond, we will add more plant details to the image in this part. We added more small flowers and larger bushes with sharp curved lines for our reference image. We also added more tufts of grass and then drew some giant mushrooms for an extra fun detail. Feel free to add even more details and plants before moving on to the final details and touches in the next part!
Step 5
In this fifth step of our how-to-draw a-pond guide, you’ll add some final touches and details. You even have the option to count some extra details! Before that, let’s finish up the final details of our image. You can use wavy bars to create the shapes of some bushes in the backdrop. This will fill in the details we’ve prepared for you, but as you said, feel free to add a few of your own! Drawing some cute fish or having a duck swim in the pond could be fun.
Step 6
For the final part of your pond design, let’s finish it off with some pretty colours! Our reference image used many bright, happy colours, including blue for water, grey for rocks, and green and red for grass and plants. You could use these colour suggestions for your image, but you can use any other colour you like! Once you’ve chosen your colours, you can choose what art mediums to bring them to life. Water colours can be fantastic for calm scenes like this to add a softer feel to the image. Alternatively, lighter mediums such as coloured markers and acrylics can help with colour popping off the page.